Showing posts with label Nails. Show all posts
2012-05-30
NOTD: Deborah Lippmann's Mermaid Dream
It's Wednesday! With the long weekend, the fact that it's already Wednesday is so exciting! This is my last week of school! Once this week is over, I have 2 days of finals and the year is over! So scary, exciting, yet relieving at the same time.
Last Wednesday, I posted a Wishlist Wednesday. On the top of my list was Deborah Lippmann's "Mermaid Dream". I had seen this polish when it first came out, but decided to put the purchase on hold. However, after that happened, the polish was sold out everywhere and I couldn't get my hands on it! Thankfully, I went back to Nordstrom this weekend, and the polish was back in stock. I bought the polish not 2 minutes after I spotted it!
To get the opacity in the photo, I applied 2-3 coats. However, had I put a green or blue base, only 1 coat would have been necessary. The only thing that doesn't make me absolutely positively love this polish, is knowing how awful it's going to be to take off. I'm thinking that I'll be making quite good friends with my acetone nail polish remover and some tin foil!
Labels:
Nails
2012-05-04
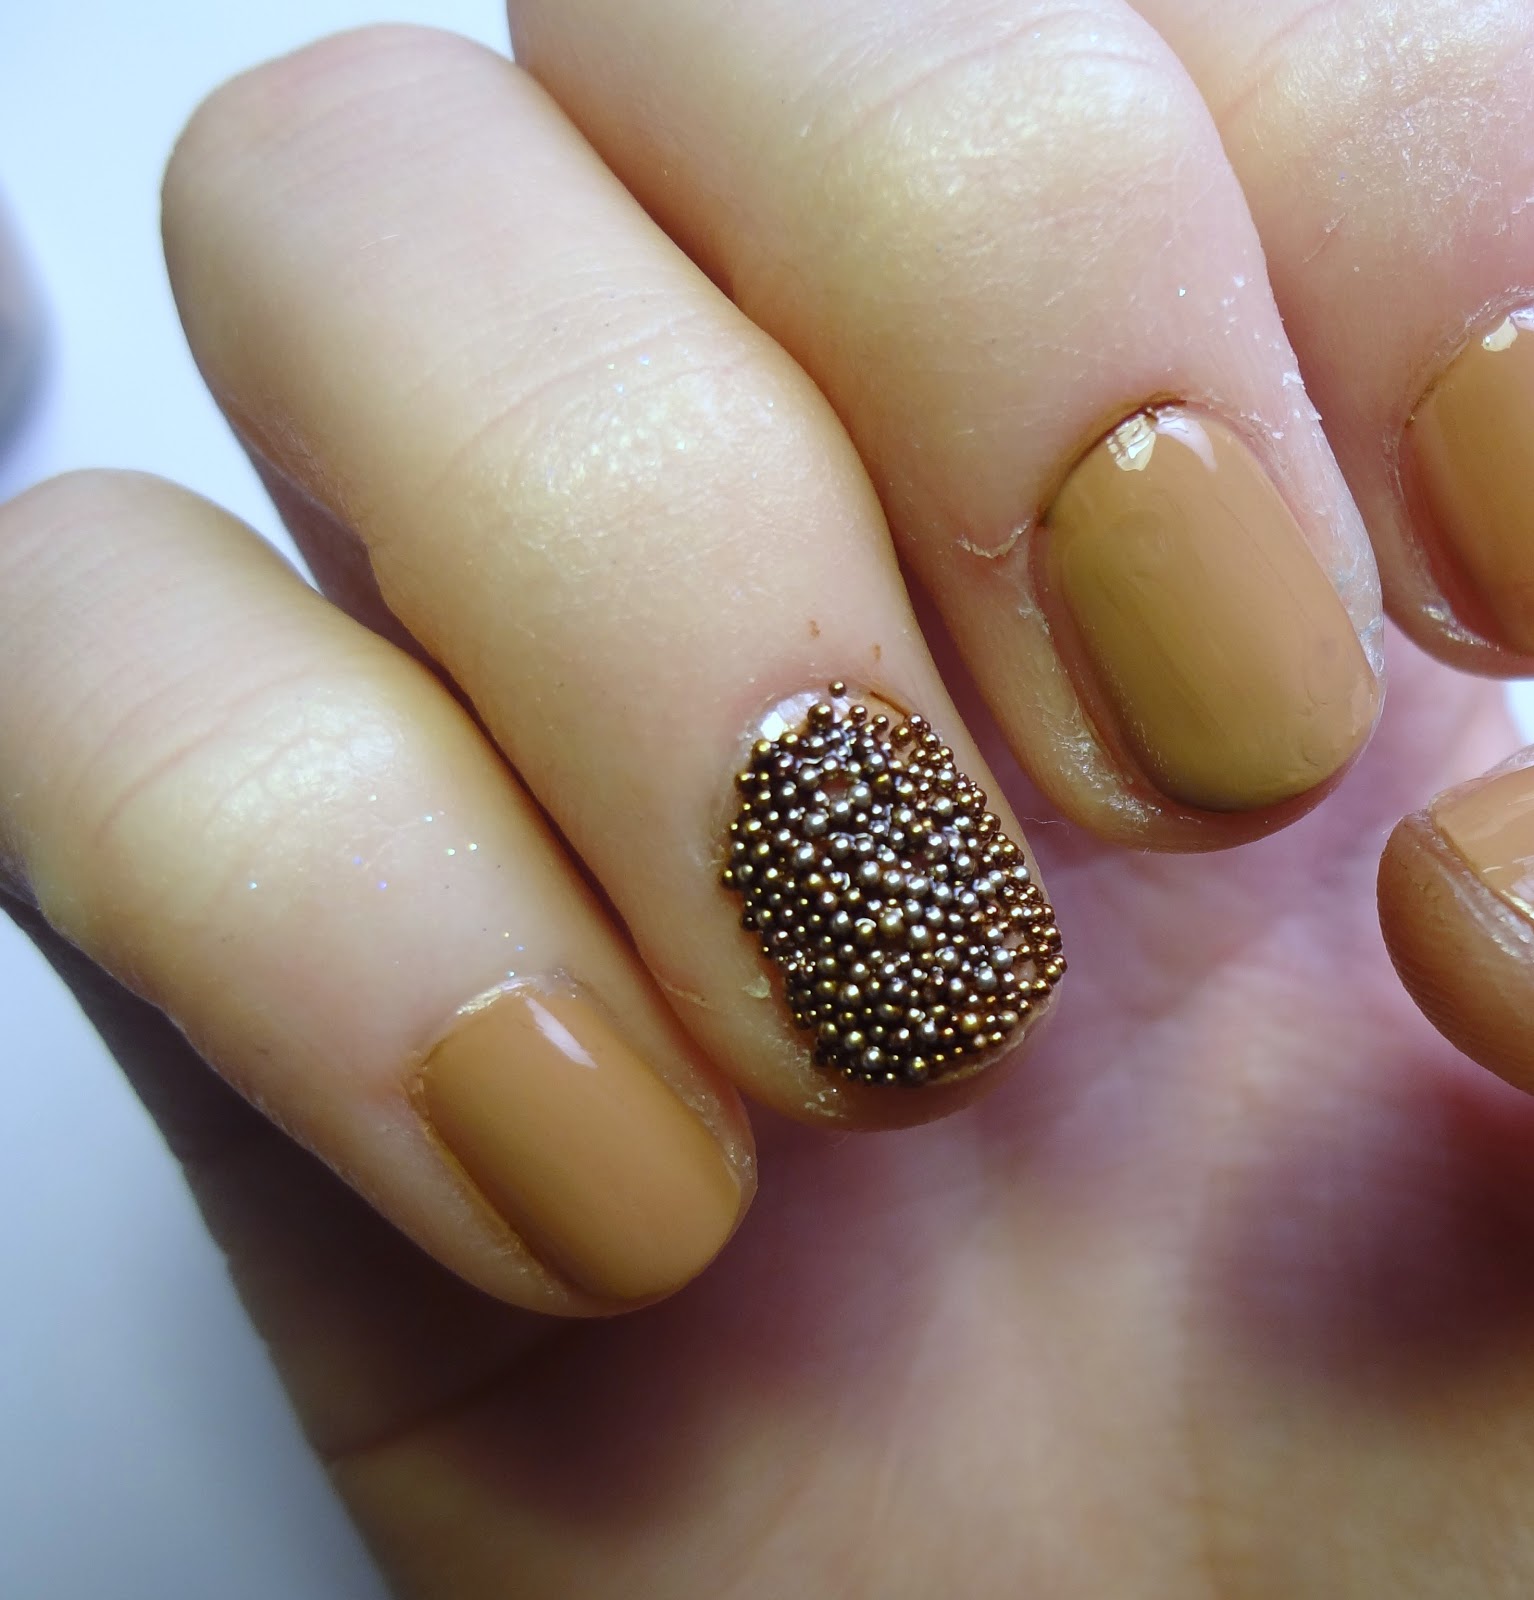
DIY Ciaté Caviar Nails
![]() |
Over the weekend I scoured my local Michael's Arts&Crafts to find the perfect looking beads to create my own DIY Caviar Nails. And I'm happy to say I think I succeeded!
The beads I found are from the brand "Recollections", which I'm sure you can find at any local arts and crafts store. The microbeads came in a case with six different colors for only $10! Amazing!
Now, to create this look, I applied a base coat (I used OPI's San Tan-tonio) and then applied the beads directly onto the accent nail. I waited a few minutes before patting the beads down to settle on the nail. Finally, after waiting about 10 minutes after that, I sealed it all up with a top coat! Simple as that, and I had a really cool nail look that received tons of compliments.
Let me know if you are loving this trend as I am, and if you are, whether you'll splurge on the Ciaté brand or try your own DIY.
No beads were ingested in the top photograph taken. Except for maybe one. But I tried to wipe them all off as soon as I got a picture I was happy with!
2011-08-04
Nails of the Day
My nails today are inspired by ThisFashionIsMine's guest blog post on FleurDeForce. The tutorial was amazing, and I can't wait to try it out as soon as I get my hands on a yellow polish that will cooperate with me! For now, I did my own spin on the ombre nail tutorial. Here's my take on the trend...
The colors I used were (left to right) Funky Fingers Shatter polish in Fuchsia Scales,
Short Story by OPI, Strawberry Margarita by OPI, Italian Love Affair by OPI, and
Start to Finish top&base coat by OPI.
First, I applied the sheer topcoat.
Next, I applied two coats of Italian Love Affair, the lightest pink.
Then, I sponged on Shorts Story, a brighter pink, and I believe it
was in OPI's neon collection last summer.
Finally, I sponge-applied Strawberry Margarita to the tips of my nails, an
almost coral color compared to the other two pinks. Apply a topcoat
and the colors will blend together and smooth out. Clean up around
the edges, as polish can be all over the place after using the sponge.
Finally, apply the crackle! This was taken the next morning, in better light. You can
see the fading effect on the nails, and I do like the purple
crackle with the pink colors underneath. I once again applied topcoat over the crackle,
for shine.
This nail look definitely took some time, so I'd only do it once again if I have
at least 45min to an hour as you need to let each coat of polish
dry before sponging on the new color, etc.
The main difference between my interpretation of the look, is I used similar colors to create a fading effect, whereas ThisFashionIsMine's look has two contrasting colors. I hope you enjoy and try out this look!
PS-sorry about the quality of the pictures. I broke my camera last month at a concert, and have yet to just give up and go buy a new camera!
Labels:
Nails
Subscribe to:
Posts (Atom)